How AV Pros Actually Set Up a Living Room Sound System for Under $500
Every few months, someone in my extended family texts me a screenshot of a soundbar they found on sale and asks if it's worth buying. My answer is almost always the same: maybe, but probably not for the reasons you think. The gear matters less than you'd expect. What really determines whether your living room sounds great or mediocre is a combination of placement, room treatment, and calibration — three things the big-box store employees almost never mention.
So here's the rundown we share with friends and family when they're ready to actually invest in a better home AV experience. Everything here can be done for $500 or less, and we've ranked it roughly by bang-for-buck value.
First, Understand Why Your Room Is Fighting You
Before you buy a single thing, it helps to understand what's happening acoustically in a typical American living room. Hard floors, flat walls, and large glass surfaces (TVs, windows, sliding doors) are everywhere — and all of them reflect sound. What you're hearing isn't just your speakers; it's your speakers plus a dozen bounced copies of the same signal arriving milliseconds later.
That flutter and muddiness you've been blaming on your old receiver? A lot of it is your room, not your equipment. This is the single most important thing to internalize before spending any money.
Step 1: Optimize Speaker Placement (Cost: $0)
Seriously — free. And it might be the highest-value move on this entire list.
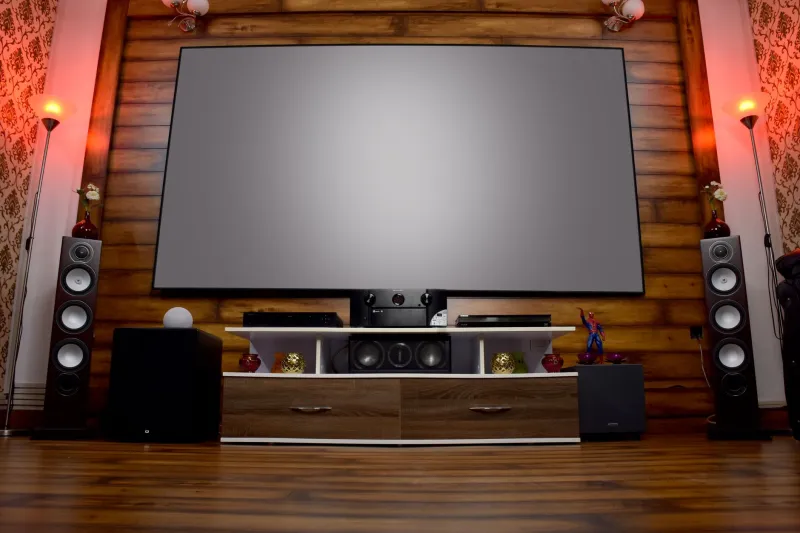
For a standard two-channel or 5.1 setup, most people place speakers wherever they physically fit, which usually means shoved into corners or sitting flat on a TV stand. Both of these choices actively work against you.
What actually works:
- Bring your front left and right speakers out from the wall at least 12–18 inches. Corner placement concentrates bass frequencies and creates a boomy, indistinct low end.
- Toe them in toward your primary listening position. A 15–30 degree angle is a good starting point.
- Get them off the TV stand entirely if you can. Speakers sitting on the same surface as your subwoofer or TV console pick up resonant vibrations that blur the soundstage.
- For a center channel, it should be as close to ear level (when seated) as possible. Mounting it on top of a TV that's 5 feet off the ground is not doing you any favors.
Spend an afternoon moving things around and actually listening to the difference. You may be surprised how much this alone changes things.
Step 2: A Few Strategic Acoustic Panels (~$80–$150)
You don't need to cover every wall. You need to treat the first reflection points — the spots on your side walls and ceiling where sound bounces before reaching your ears.
Here's a simple trick: sit in your main listening spot and have someone hold a mirror flat against the side wall. Wherever you can see a speaker in the mirror, that's a first reflection point. Put a panel there.
For most living rooms, treating four to six points makes a significant audible difference. A set of 2-inch thick acoustic panels from brands like Acoustimac or even the more affordable generic options on Amazon will do the job. You're not looking for professional studio treatment here — just enough absorption to knock down the worst flutter and slap echo.
Budget tip: Rigid fiberglass insulation (Owens Corning 703 or 705) wrapped in breathable fabric is what a lot of pros use in their own homes. It's cheaper per square foot than pre-made panels and performs just as well. You can find DIY tutorials specific to this all over YouTube.
Total for this step: roughly $80–$150 depending on how many panels you build or buy.
Step 3: A Better Streaming Device (~$50–$130)
If you're still running your TV's built-in apps for Netflix, Plex, or whatever else you're watching, you're leaving video and audio quality on the table. Integrated smart TV software is almost universally slower, less capable, and less frequently updated than a dedicated streaming device.
Here's how the main options stack up for most US households:
- Roku Ultra (~$100): Consistently reliable, supports Dolby Vision and Atmos passthrough, and doesn't push you into a walled garden ecosystem. Great for households with mixed streaming service subscriptions.
- Apple TV 4K (~$130): The best option if you're already in the Apple ecosystem. Excellent AV performance and the only streaming device with a genuinely useful calibration feature (more on that below).
- Amazon Fire TV Stick 4K Max (~$60): Solid performance, but the interface prioritizes Amazon's own content, which gets annoying fast. Still a big upgrade over a built-in smart TV platform.
- Google TV Stick (~$50): Budget-friendly and surprisingly capable for the price.
For most people, the Roku Ultra or Apple TV 4K hits the sweet spot between price and capability.
Step 4: Run Automatic Calibration — Actually Run It (~$0 if your receiver supports it)
If you have an AV receiver made in the last ten years, there's a very good chance it came with an automatic calibration system — Audyssey (Denon/Marantz), YPAO (Yamaha), MCACC (Pioneer), or AccuEQ (Onkyo). Most people set up their system, skip the calibration step, and never go back.
Run it. Use the included microphone, follow the prompts, and let the receiver measure your room and adjust accordingly. It takes about 15 minutes and it genuinely works. Calibration corrects for speaker distance, level differences, and basic frequency response issues caused by your room's dimensions.
If you want to go deeper without spending much, the REW (Room EQ Wizard) software is free and, paired with a calibrated measurement mic (the MiniDSP UMIK-1 runs about $75), gives you the same kind of acoustic analysis that commercial installers charge for. It has a learning curve, but the AVP Users community forum has threads walking through the basics if you want to dig in.
Putting It All Together
Here's a realistic budget breakdown:
| Upgrade | Estimated Cost |
|---|---|
| Speaker placement optimization | $0 |
| 4–6 acoustic panels (DIY) | $80–$120 |
| Streaming device (Roku Ultra) | $100 |
| Calibration mic (UMIK-1) | $75 |
| Miscellaneous (speaker stands, cables) | $50–$100 |
| Total | ~$305–$395 |
That leaves you $100–$200 of breathing room within the $500 budget — which you can put toward a better subwoofer placement solution, additional room treatment, or just hold onto for your next upgrade cycle.
The honest truth is that most home AV setups suffer from the same three problems: bad placement, untreated rooms, and skipped calibration. None of those require expensive gear to fix. The professionals reading this already know it — now your living room can benefit from it too.
Have questions about your specific room setup? Drop them in the community forum. That's what we're here for.